by Jahan Zaib Hello everyone!
In this tutorial i will show you how to model a high definition building in 3ds Max 9. This is part 2 of my tutorial, you still need 3ds max 9 and some High Resolution Images of Buildings and Skyscrapers. You can not start without good reference images, they are important. U can get some from http://www.environment-textures.com - you will find high resolution images of buildings there.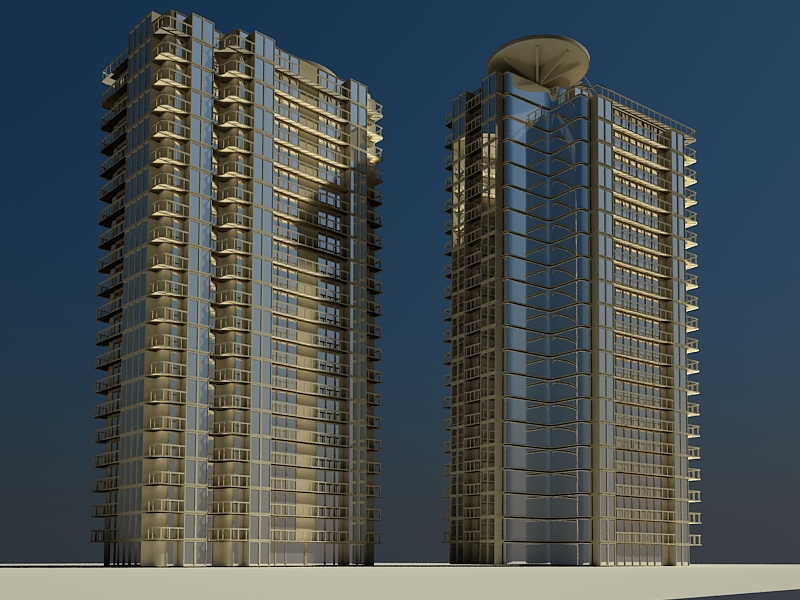
..for modeling a building first you need a basic floor plane for the building design. Let me show you the basic floor plane what i mean and how it work …
So lets start it!!!
basic floor plane …
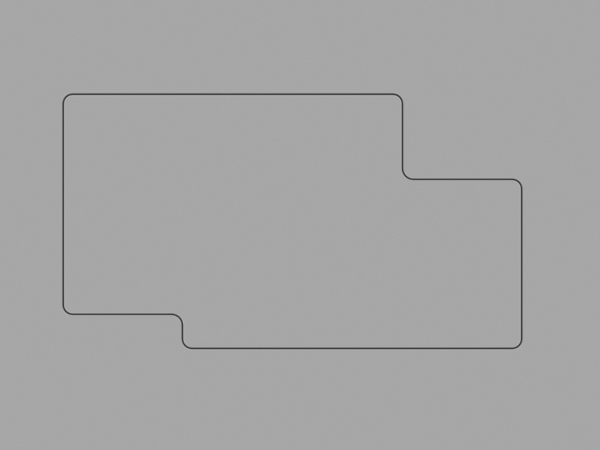
Step 1:open 3ds max 9 or any later version .now make a plane in top view with the same dimensions as
basic floor plane Length: 480 and Width: 640 .
Step 2:Open the material editor >select any material slot and add the basic floor plane image in it.. then apply this material on this the basic floor plane .
Step 3:go in Shapes> select Line and start.
Step 4:now start making the line as shown in our basic floor plane just follow the basic floor plane lines .
Step 5:right click on the line and then convert it to Editable Poly.
Step 6:after editable poly ,lines look like as poly mesh .
Step 7:go to Polygon >select the polygone .
Step 8:Extrude it to: 48.152 .
Step 9:thats the ground floor now we will add doors and windows. but first i have to make a
copy of our ground floor this copy will be use in making of our other floors of building.
go to Edit >Clone> now choose Copy option and click ok.
Step 10:now just drag up the floor you will see the copy of ground floor and hide it by the right click
on the object and choose Hide Selection.
Step 11:delete the basic floor plane plane and rotate the view and see ground floor bottom this is open
now need to fill it it.
go to Editable Poly>Border>select the ground floor bottom edge.
Step 12:go to Edit Borders >click on Cap.
Step 13:go to Editable Poly>Edge>select the top and bottom edges.
Step 14:go to Editable Poly>Edge>click on Chamfer set (0.394 ).
Step 15:open Modifier List and select the Mesh Smooth .
Step 16:then see the result of Mesh Smooth this is looking tribal lets fix it.
Step 17:now go to the Editable Poly>Polygon>select top and bottom faces. and click on Inset (1.0)
Step 18:now apply the Mesh Smooth and check result.
Step 19:now make a new box with windows. this box will make add more details in our building ,lets see how it works.
Step 20:right click on the object then convert it to Editable Poly>Edge>select 2 edges from front. and click on Connect with 1 Segment.
select 2 faces from front. and click on Inset (1.9). and change settings as like image.
Step 21:Editable Poly>Polygon>click on Extrude (-1.644).
Step 22:clone this box 8 time and setup up as like this image.
Step 23:now lets make a window and use it for empty places in my ground floor. make a box in same size of our first window but just use one side of window for the dimensions.
Step 24:Editable Poly>Polygon>select the face and click on Inset (0.21).
Step 24:now click on Extrude (-0.18) and window is complete.
Step 25:now i need to clone this window many time and fill the empty places of ground floor as like the picture below.
Step 26:now lets make a new windows for this empty place.
Step 27:go to Editable Poly>Polygon>select the face and click on Inset (1.52).
Step 28:now click on Extrude (-1.445) and use the type: Local Normal.
Step 29:Inset just one more time (0.41) then check how’s looks.
Step 30:now i am going to make a roof for ground floor just right click on the object and select the Unhide All .you will see a shape of the building i hide it in Step 10 .
Step 31:that shape need to be scale down as like roof size, now i will make the some changes in roof. go to Editable Poly> Vertex>and change the vertex position as like pictures.
Vertex Position.
Step 32:apply the color on ground floor.
Thanks for the reading.. We have just finished the Part 01 of This Tutorial.
Step 01:select all , clone the ground floor and move it up as like in the picture.
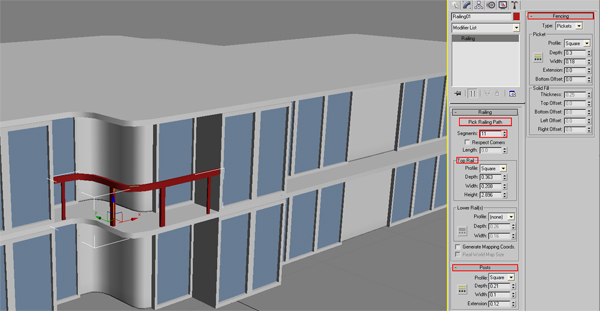
Step 02:now need to add Railing in the empty area .first choose the area where i need to add Railing
then go to Shapes>Line>and start making line as like area shape.
Step 03:Geometry>ACE Extended>Railing >Pick Railing Path>click on Line.
make some changes
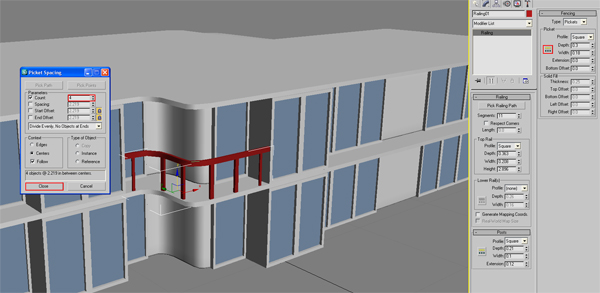
delete the line .
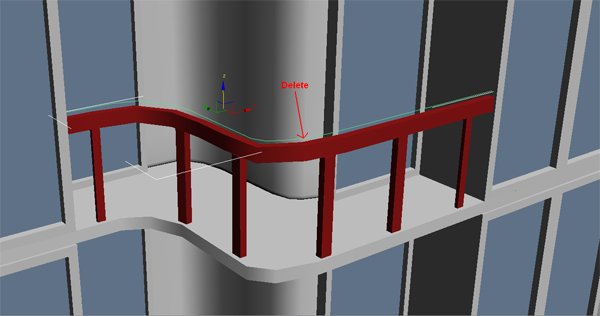
Step 04:just change the Railing color and use the same method for all Railing area in ground floor.
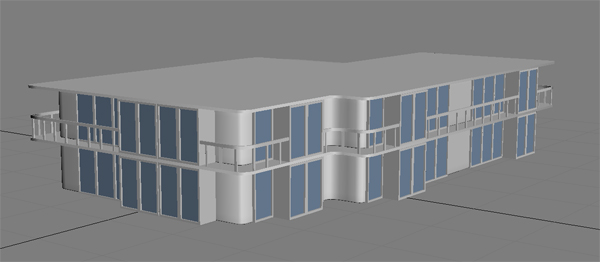
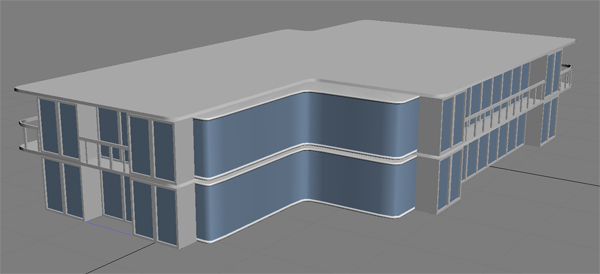
Step 05:Select the first floor and clone it 18 times.

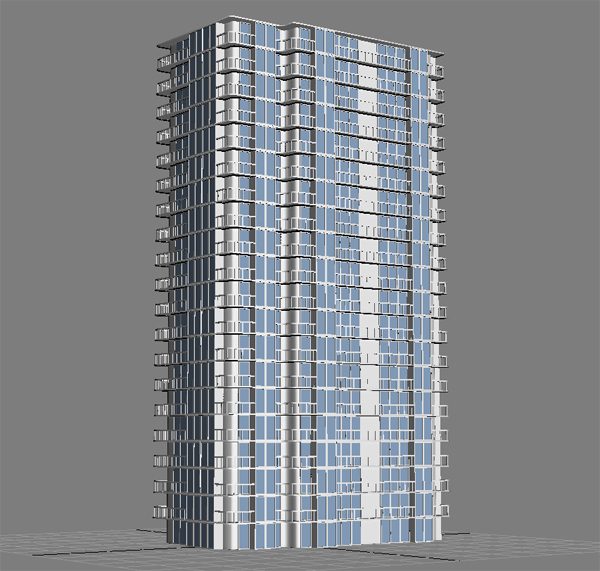
Step 06: Looks cool
some changes in windows.
go to Editable Poly> click on Attach and attach both windows.
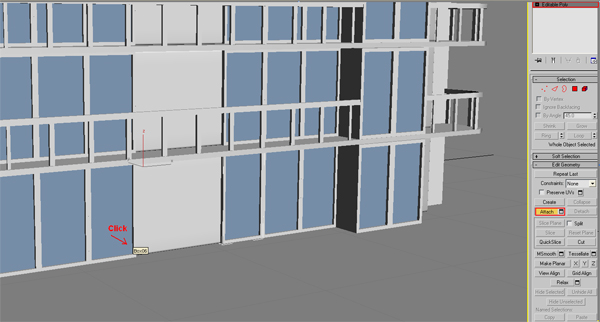
Step 07:start editing in this window for change it in door. select the vertexes and move close the vertexes position.
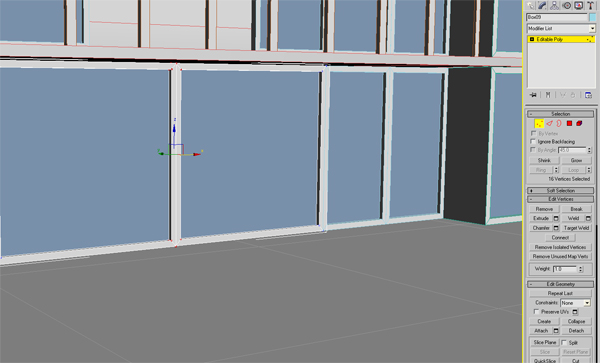
make some space for the door handle.
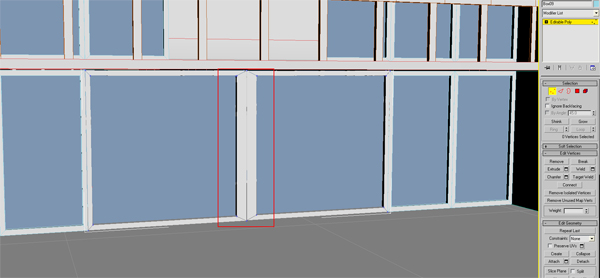
Step 08: i have completed the door frame lets start the door handle then door will be complete.
go to Shapes>Line>and make handle shape.
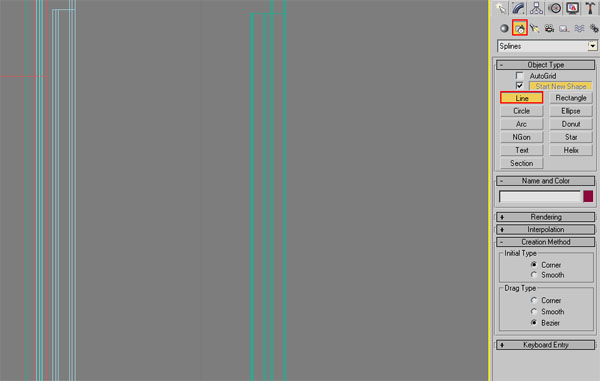
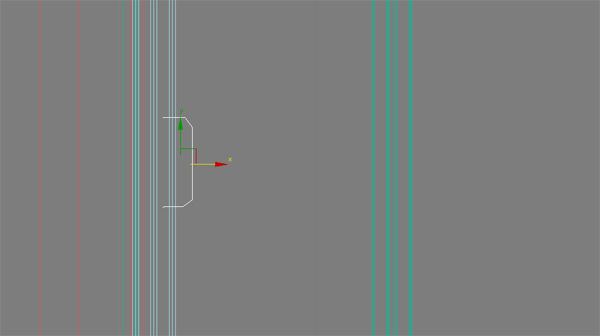
Step 09: go to Modify>Rendering>click on Enable In Renderer and Enable.
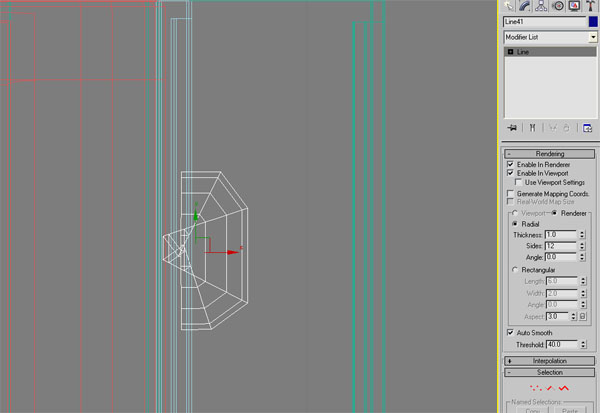
lets make some changes.
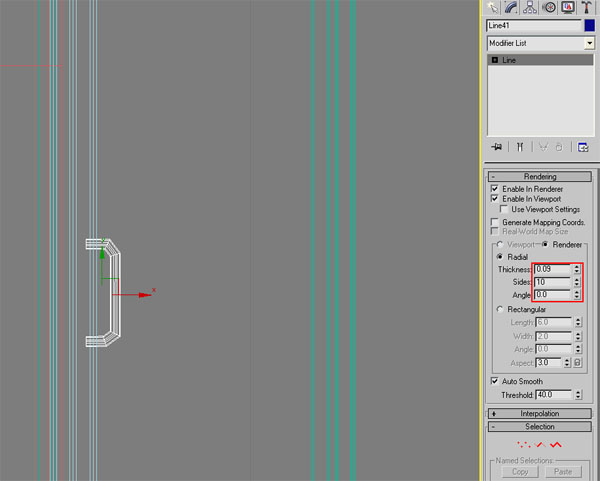
Step 10: fix the handle on right place and clone it as like picture.
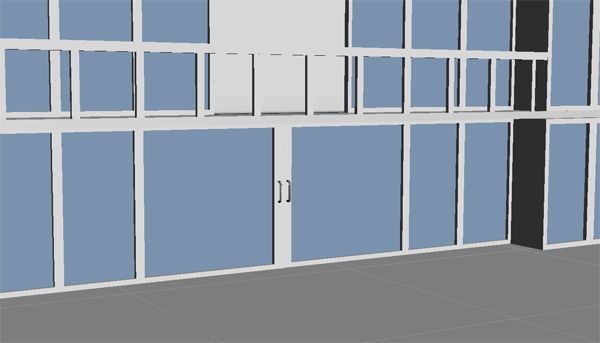
Step 11: ground floor have completed. now i will make top floor.
clone the top floor with out roof and attach the all parts of top floor.
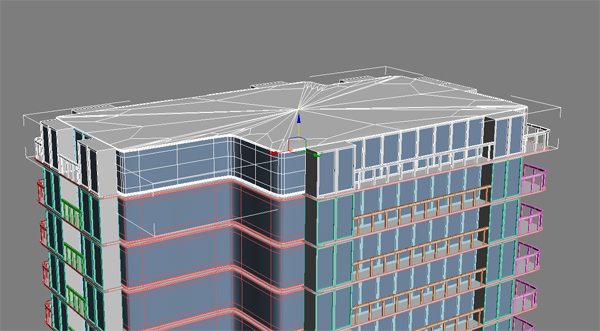
Step 12: Delete these Railing and 3 windows.
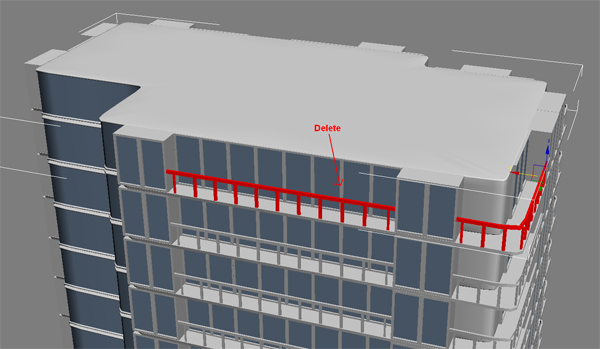
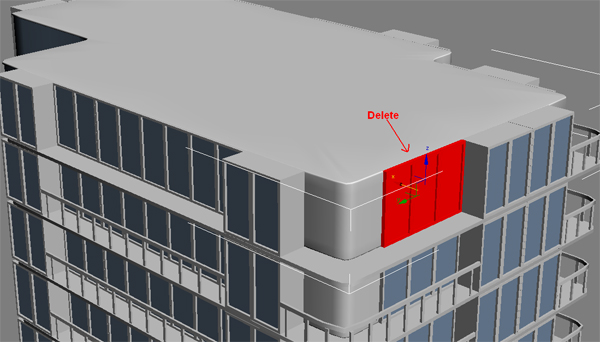
Step 13: Editable Poly>Vertex>select these vertexes and move back as like pictures.
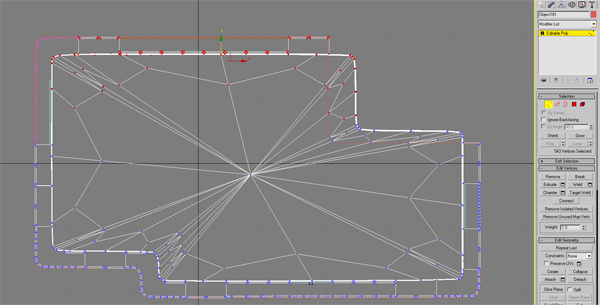
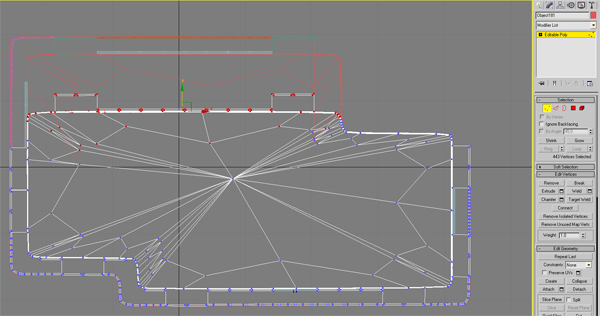
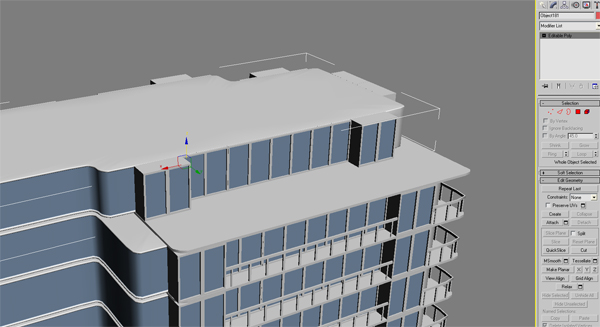
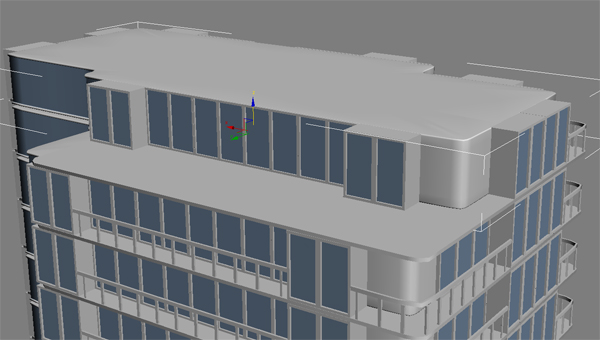
Step 14: now need to fix this place. go to Editable Poly>Vertex>select these vertexes and set
position.
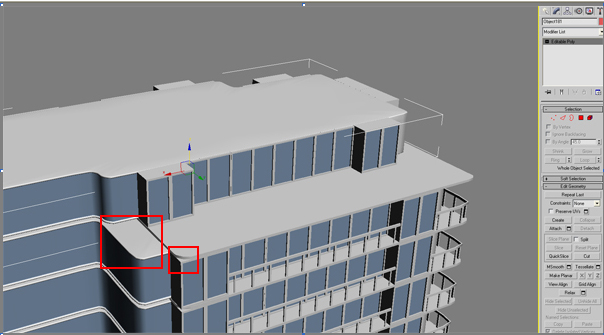
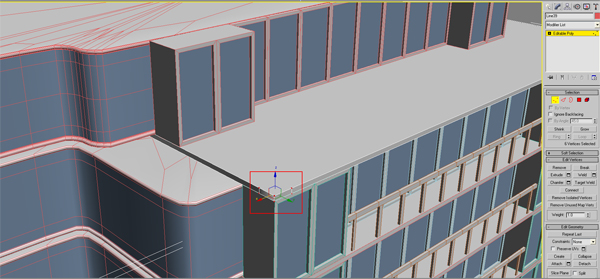
Step 15: lets finish the last part of this area .go to Editable Poly>select Cut and make the cuts
here.
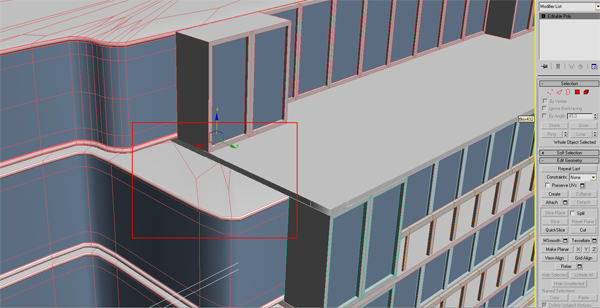
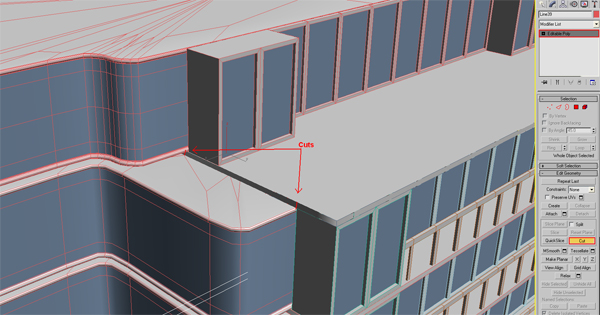
Step 16: go to Editable Poly>Polygon>select the face and Extrude (32.262).
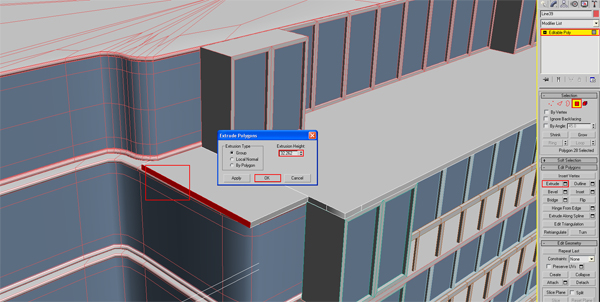
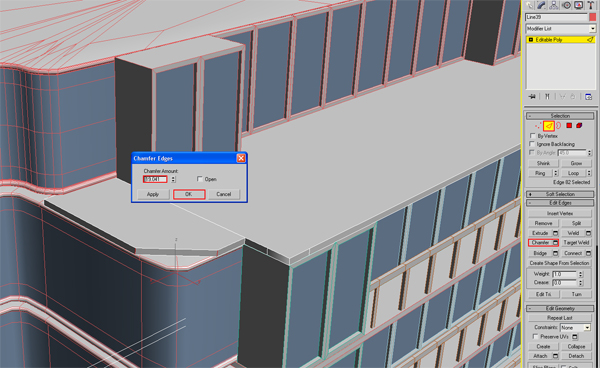
Step 17: select the Edge>Chamfer (19.041).
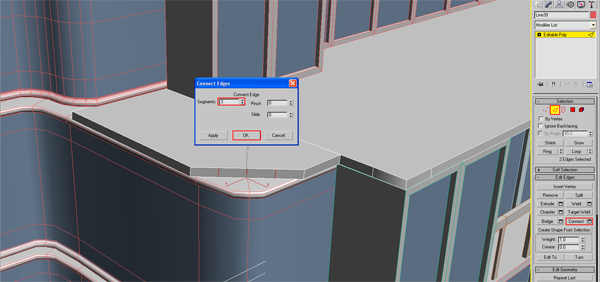
Step 18: select both edges and Connect with 3 segments.
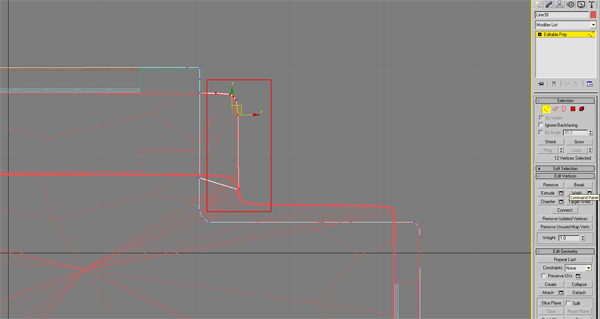
Step 19: set the vertexes position as like picture.
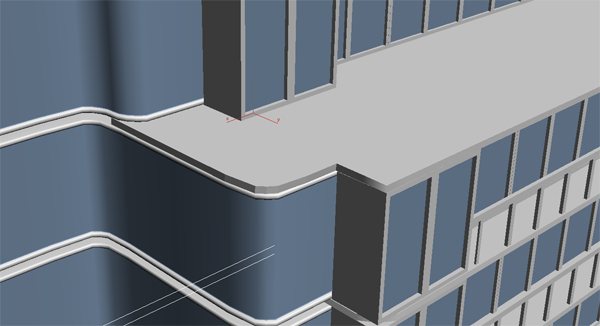
Step 20: lets make the Railing with the same method, I did in Step 34.
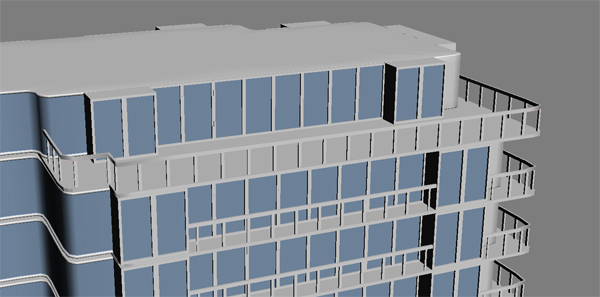
Step 21: i am going to make Helipad and the end of tutorial i will make stairs.
go to Geometry>Cylinder>and make a Cylinder for Helipad base.
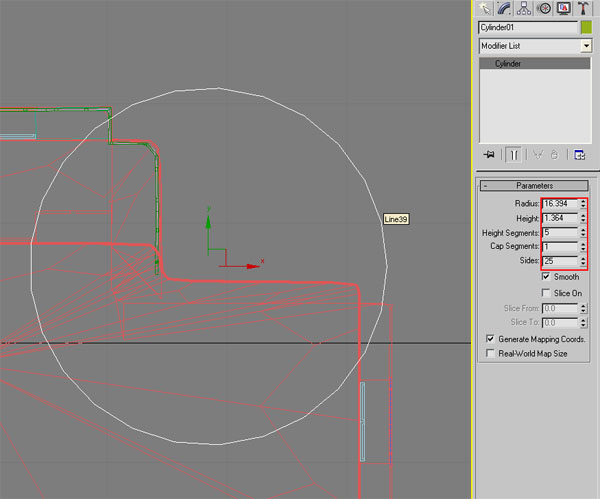
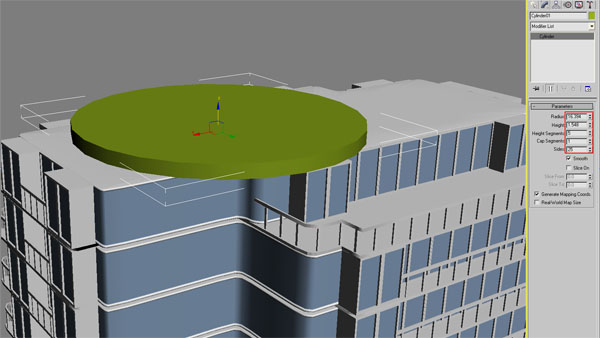
Step 22: right click on the object and then convert it to Editable Poly.
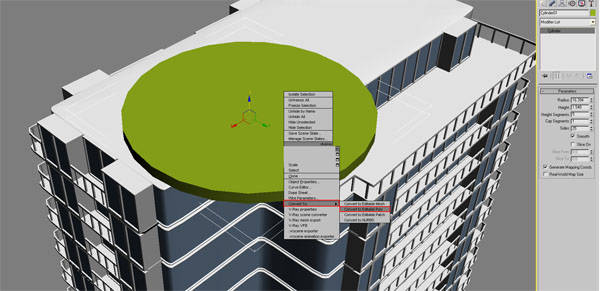
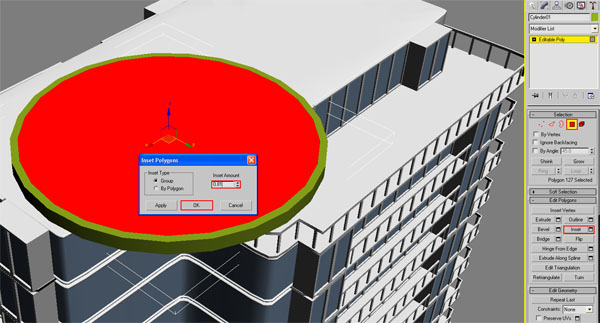
Step 23: Polygon>select the face and click on Inset (0.81).
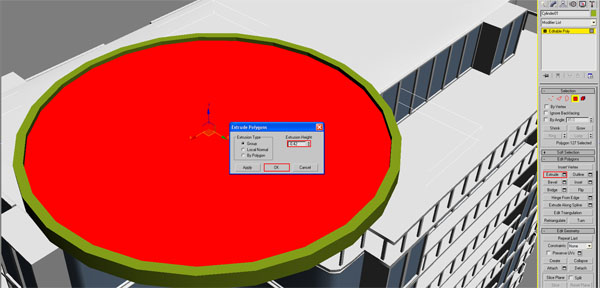
Step 24: click on Extrude (-0.42)
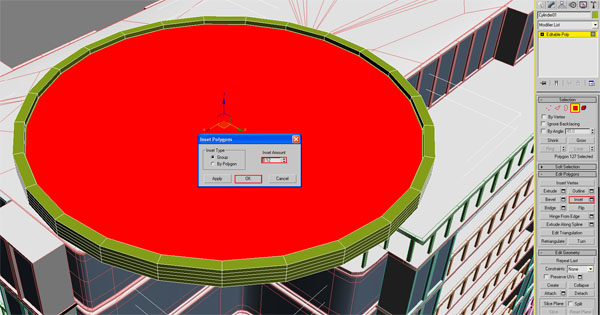
Step 25:Inset (0.12) and Inset (4.08) again one more time. now apply the Mesh Smooth from Modify.
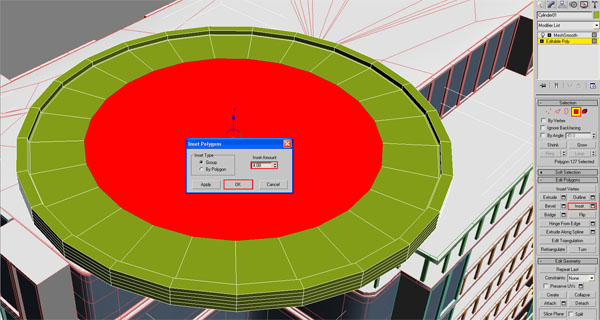
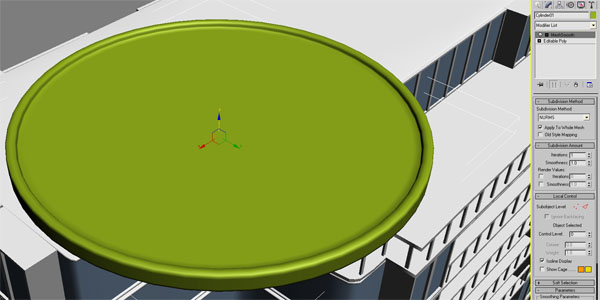
Step 26:bottom of Helipad is looking not not good just Inset (4.08) the bottom one time then it will be fine.
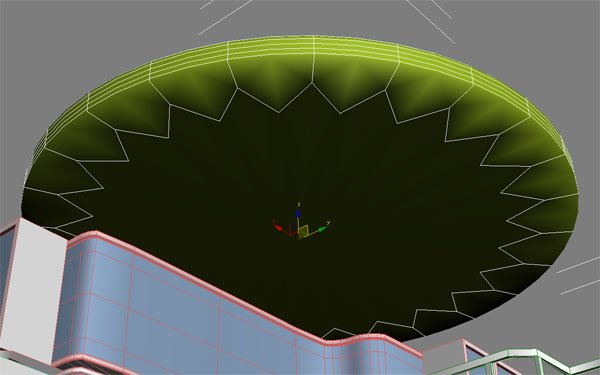
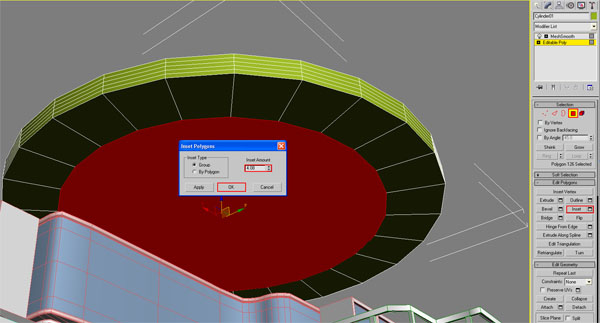
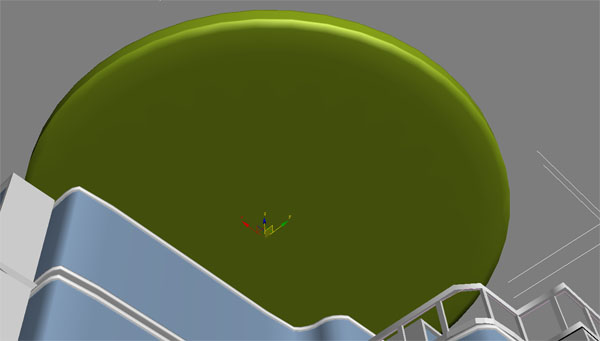
Step 27:now need to make Helipad Logo. go to Shapes >Text> write H and click on view port.
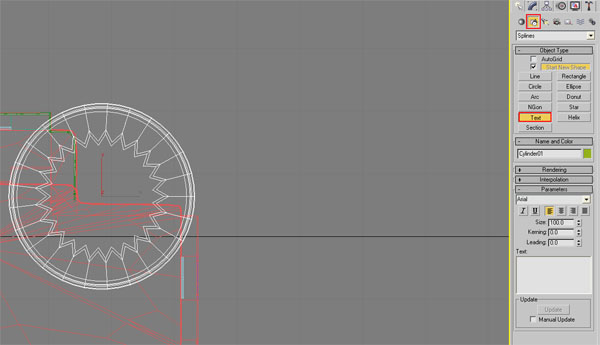
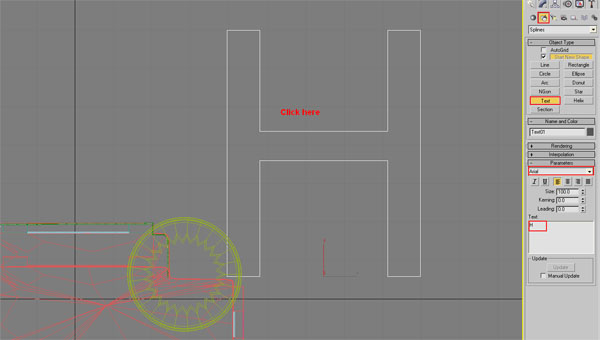
Step 28: scale down the text and adjust on Helipad then right click on the text and convert it in to
Editable Poly.
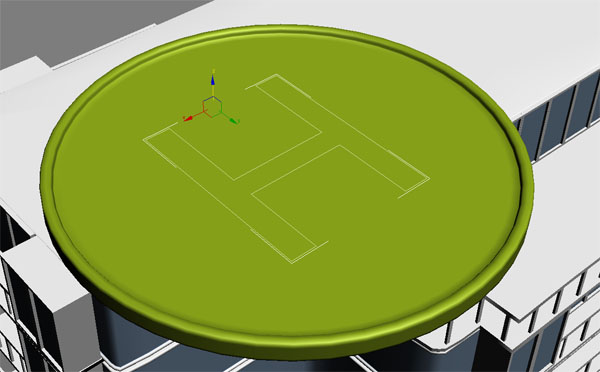
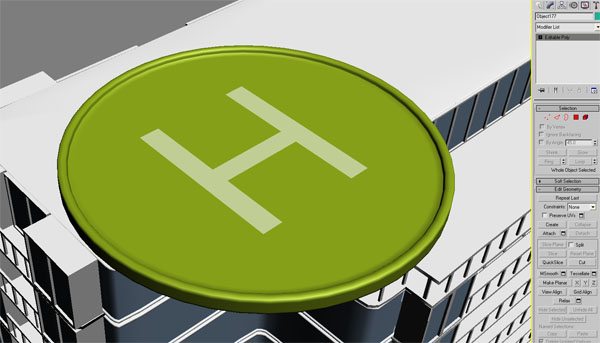
Step 29: select the face and Extrude (0.3)
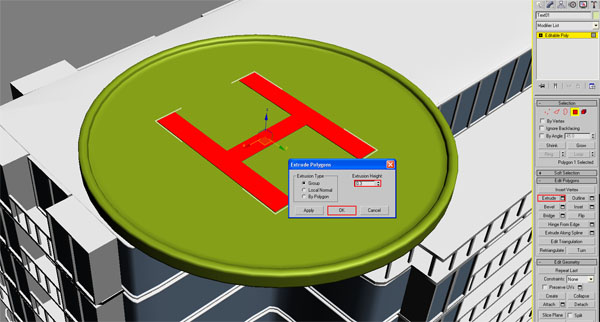
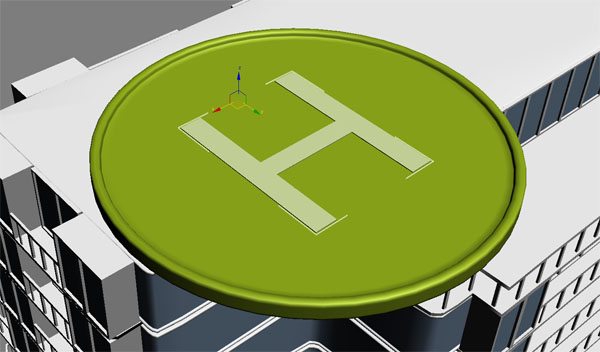
Step 30: now lets make the helipad stand. go to Geometry>Box >make a box shape as like pictures.
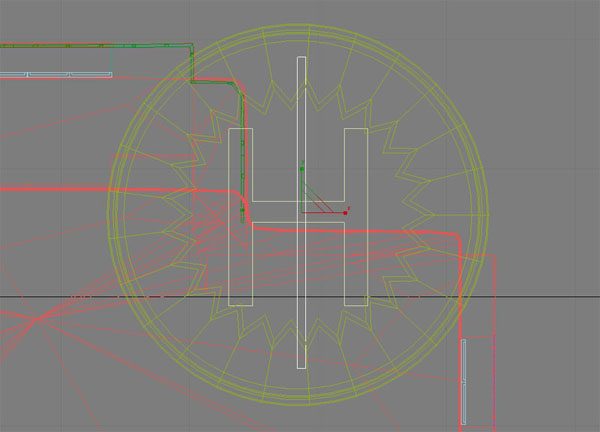
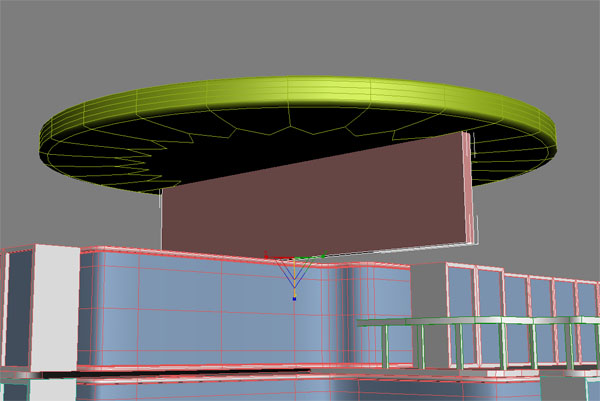
add one edge in the center of box and change the box color.
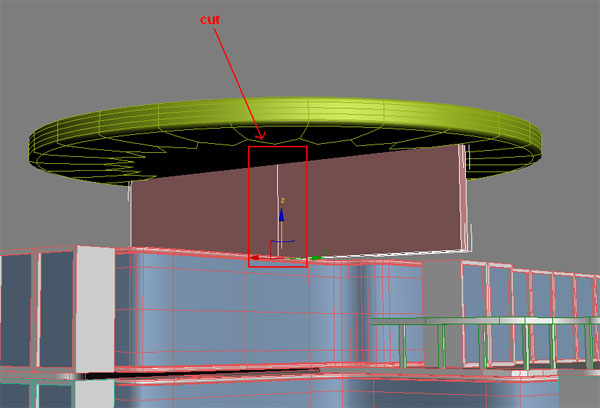
clone the box 3 times and rotate the boxes position as like picture.
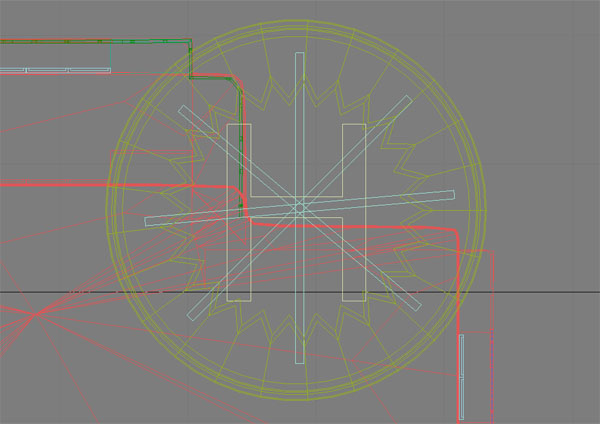
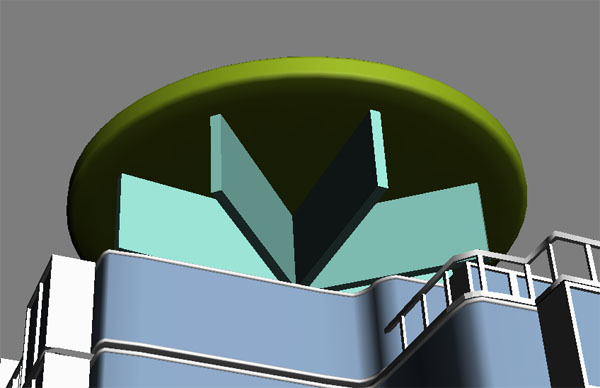
now attach the all boxes. and go to Editable Poly>Vertex>select these vertexes and move up.
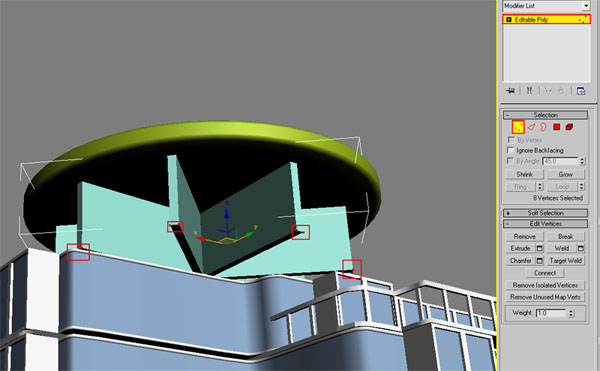
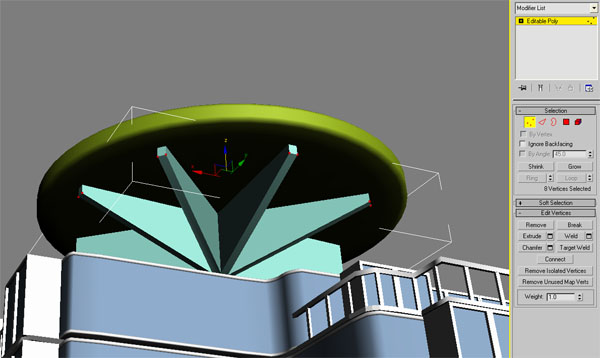
Step 31: now lets make stairs . go to Geometry>Stairs>Straight Stair>make stairs and change
setting as like picture.
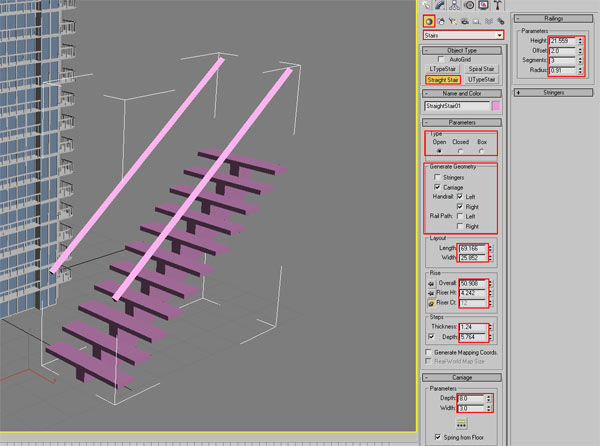
just scale down the stairs and fix it here.
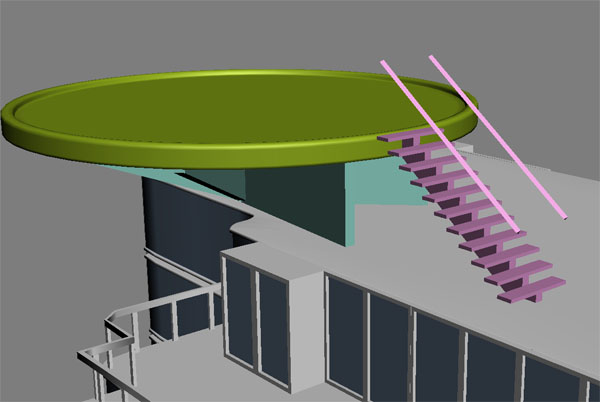
go to Editable Poly>Polygon>select these faces and Extrude it two times and drag it as like picture
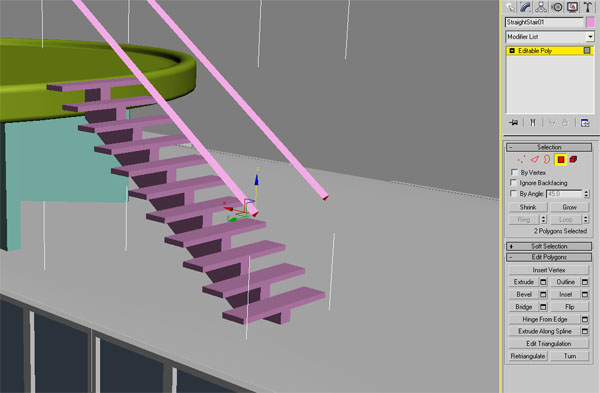
now repeat this method for other side of stairs.
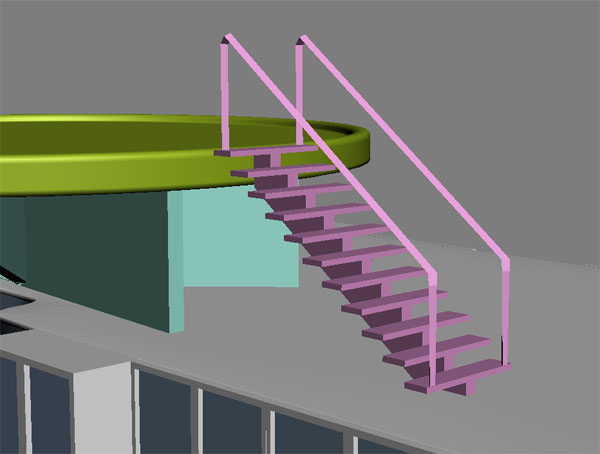
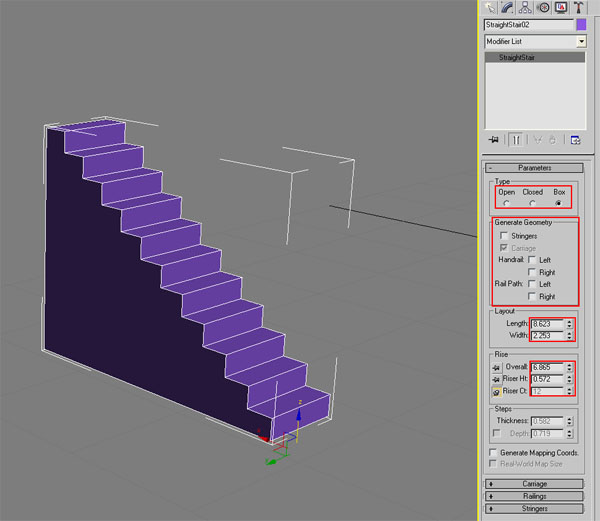
Step 32: now lets work on our last stairs .go to Geometry>Stairs>Straight Stair> make stairs and change
setting as like picture.
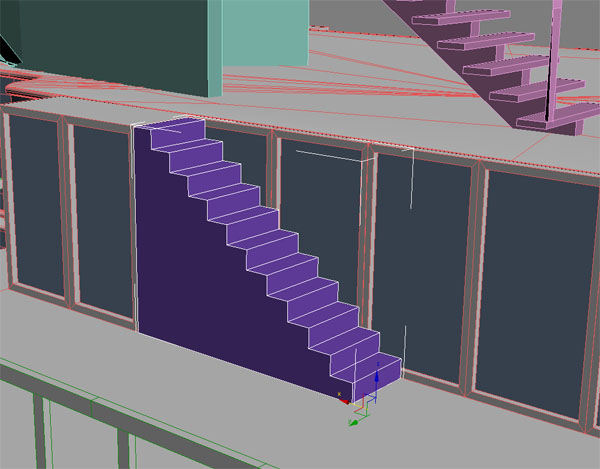
just scale down the stairs and fix it here.
now change the color of stairs ,helipad and Now you have just completed the High-rise Building
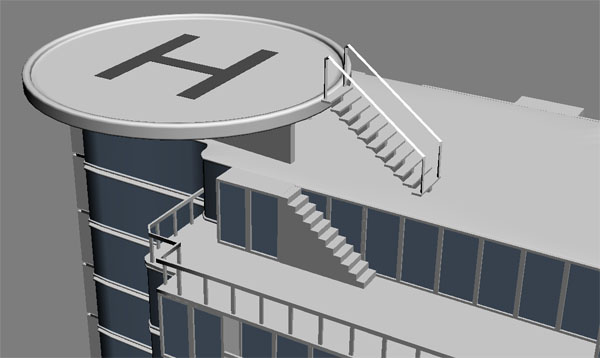
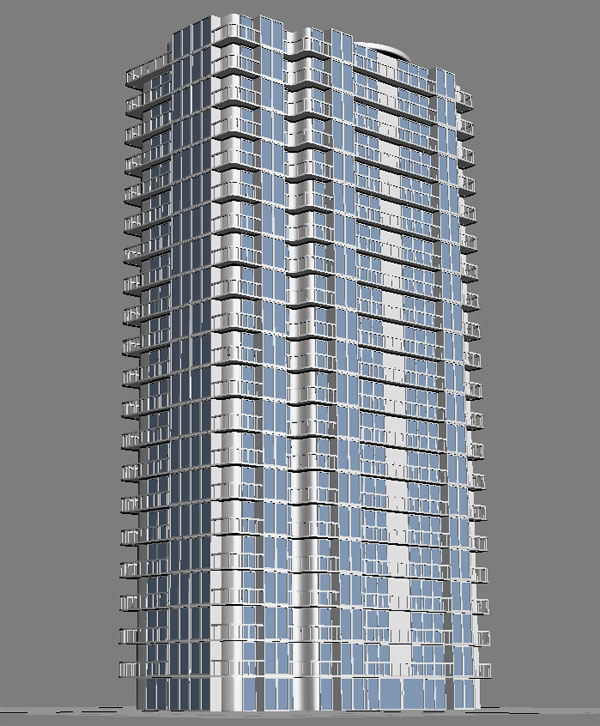
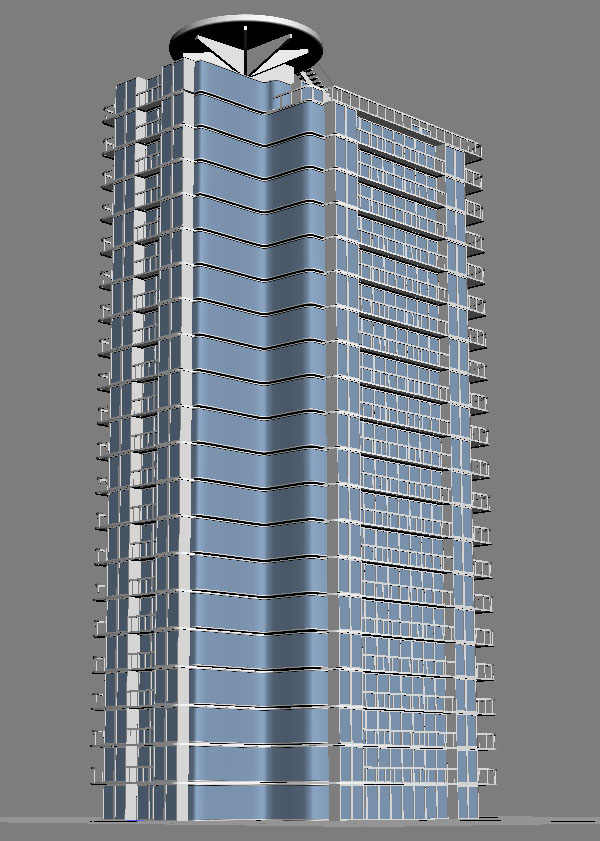
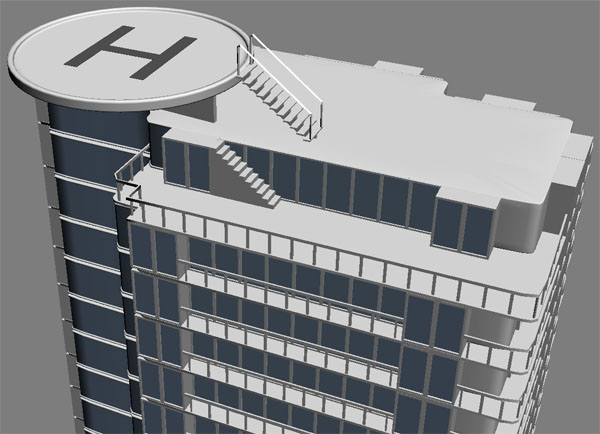
We just completed second part of this tutorial … thanks for reading and good luck modeling.
Did you already create your own model? Show us your result! Send it by mail or upload to our facebook page at: http://www.facebook.com/3dtutorials
No comments:
Post a Comment