
INTRODUCTION
First of all thank you for reading this! Since this particular project is consisted of 10 completely different scenes I chose to explain the crucial parts instead of walking you through with only one scene. I had the chance to visit this building personally 2 years ago. As a matter of fact I found it out of pure luck just by wandering in the forest in Tallinn. It was 2 years ago as I said and I knew it immediately that I will do my 3d version of this at some point. And when it came I started with gathering all the information I could find on the internet. I downloaded literally all the photos I could get my hands on.
MODELING
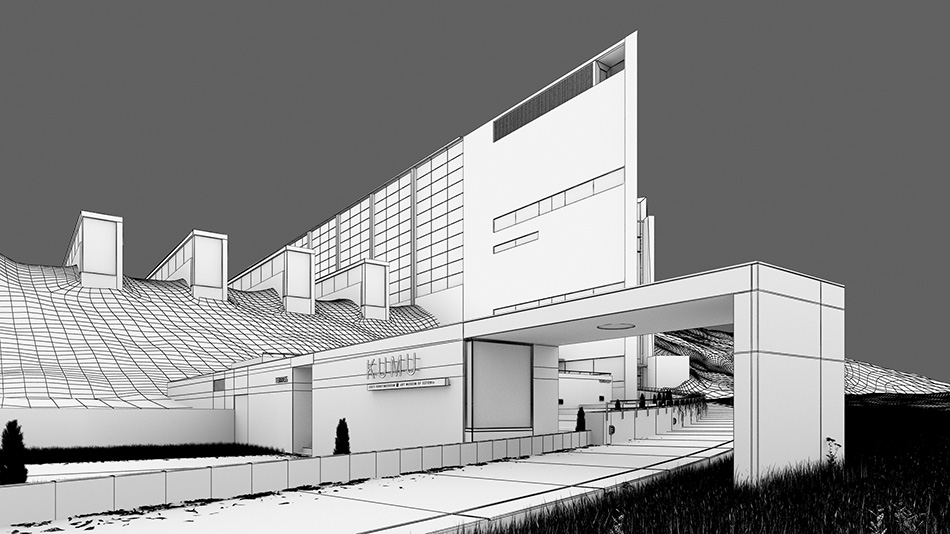
A big help was that I found a digital model of the building on the net. And even though I eventually had to remodel each and every element I still owe Ankit Surti and Samuel Gwynn a huge thank. Their model was mandatory! I didn't want to model the environment since there's a vast amount of renders out there on the subject and I already had my share of that in the Normafa House project. In fact I wanted to avoid that as much as I could. All the trees in the background and foreground are 2d elements put there in Photoshop. There is an article coming out in 3d Artist magazine issue 17 about the modelling of the scene. If you are interested in this part you can read it there.
THE SNOW
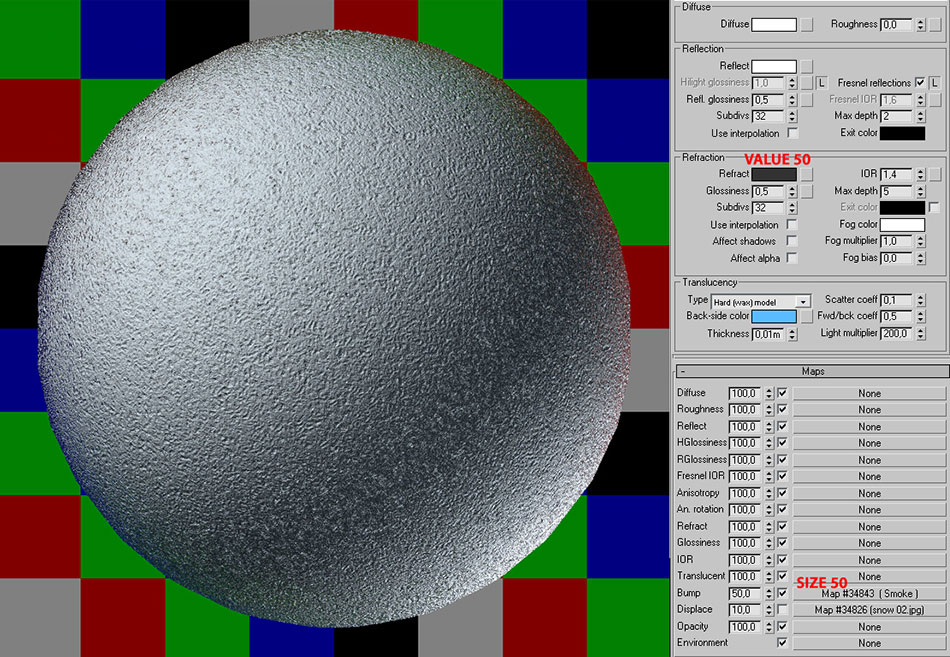
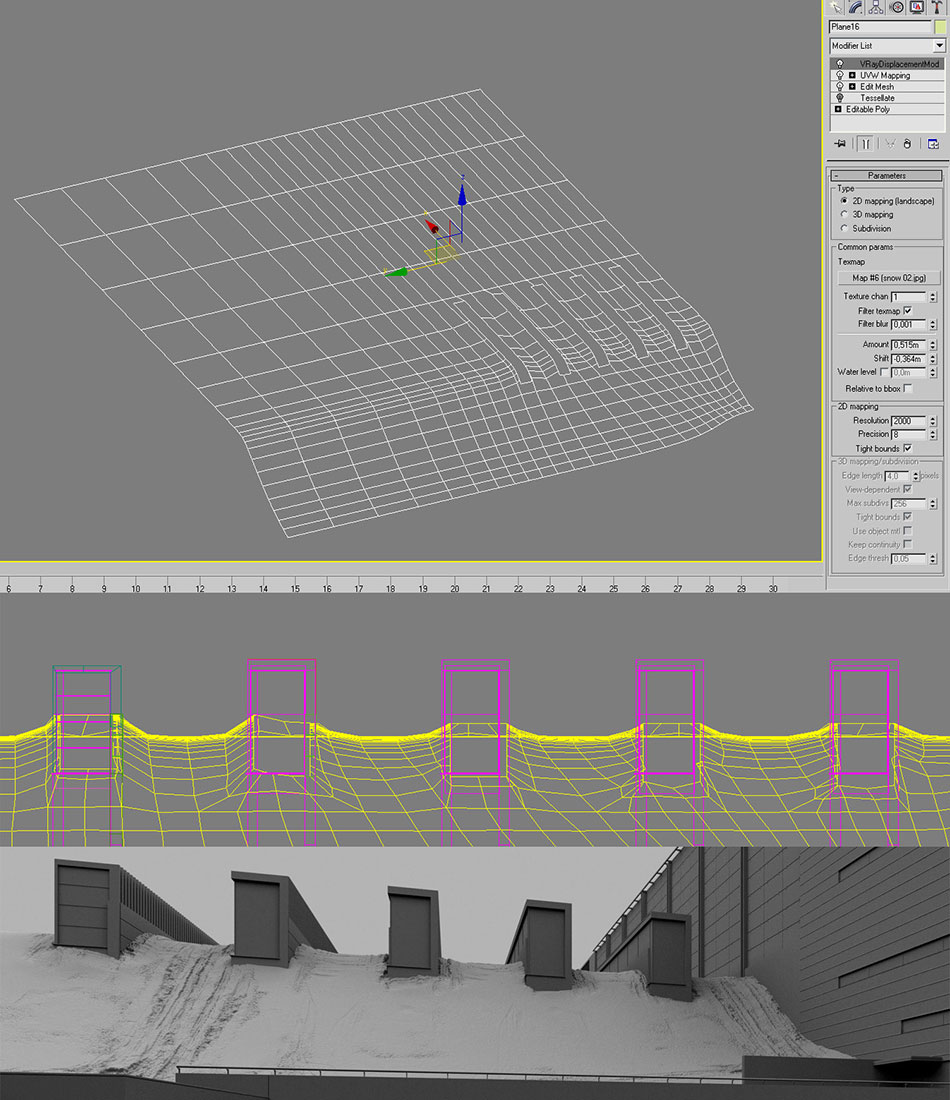
The snow and the terrain is actually rendered. It is a simple plane nothing special. As a matter of fact it is more than just one plane. It's at least 4 or 5 planes I put down so from the camera it looks like one whole thing but it's actually more small parts. You couldn't just fly up and take a look around cause then you would notice that it's falling apart and only comes together from that particular view. I formed the planes to follow the slopes using primitive tools such as FFD box. I used edit mesh smooth selection to lift the terrain a bit next to walls like the snow is kinda climbing up there a bit. I always apply a noise modifier too and a turbosmooth or at least a tesselate modifier to make the ground uneven but smooth. The tracks and such marks in the snow was done by a simple displacement modifier. I took a snapshot from a top view and then drew a map in Photoshop from the bitmaps I found on the net. Pretty simple again and worked just fine! It has a translucent hard wax type refractive material with a bluish back color.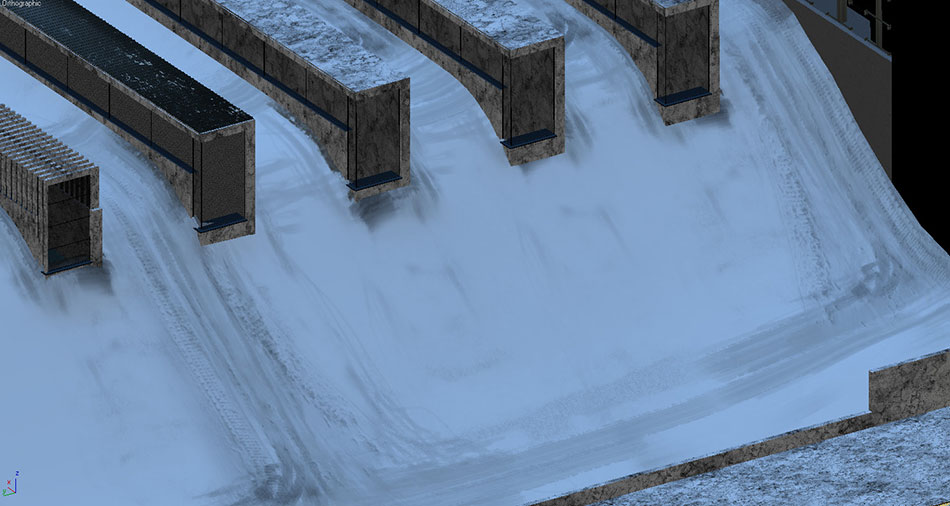
THE GRASS
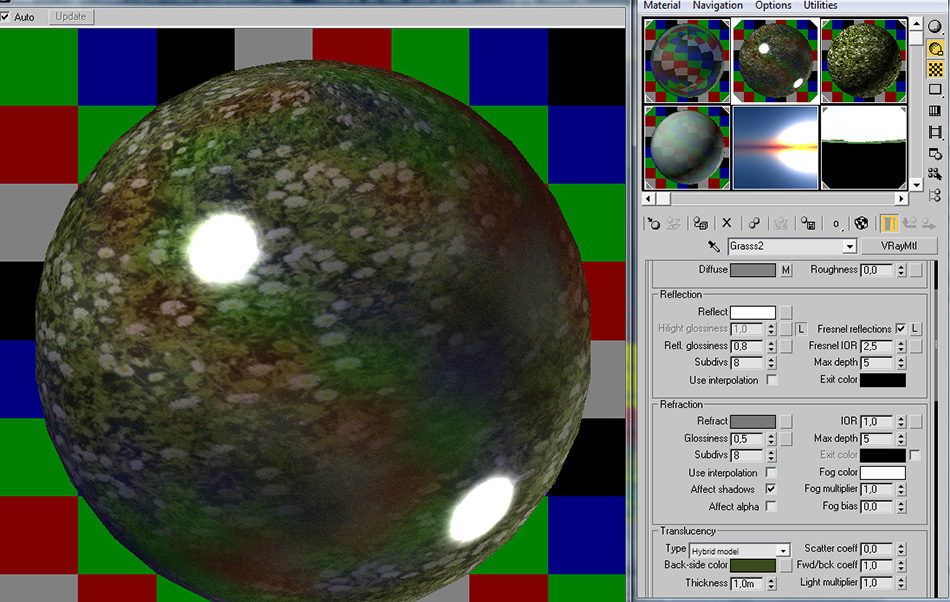
The grass was partially modelled and partially done by displacement. Obviously only used model when it was close to the camera (only in the fall render). It was done by that old trick: I modelled a few single grass straws and scattered them on a patch then converted them into a vray proxy and about done! I did two kinda patches. One with a shorter grass and one with longer. The longer was used at the bottom of the wall in the foreground. For the rest I used the same method Red Vertex taught. There are two terrains. The first has a translucent material and a displacement modifier and the other has the same material except with no refraction at all and no displacement. For the diffuse I used a bitmap with a meadow with flowers to make the landscape more colorful.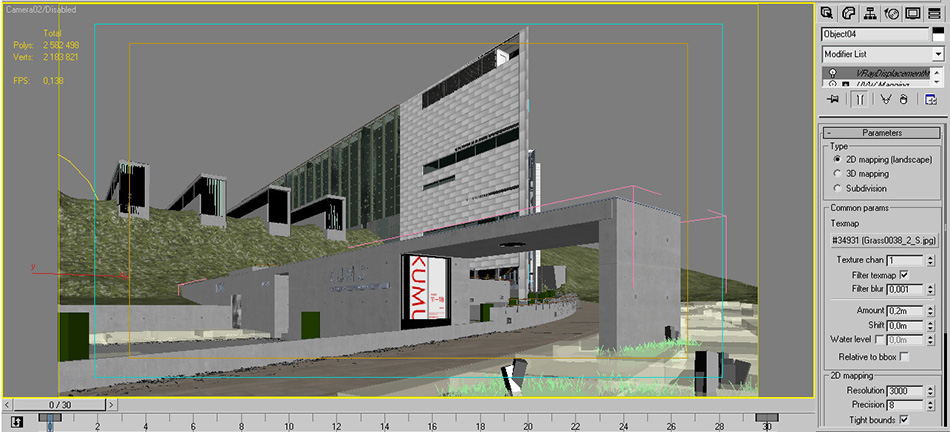
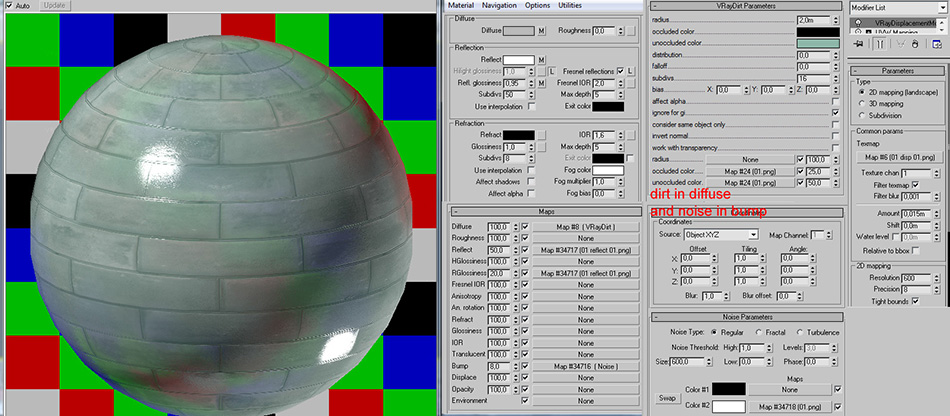
THE MATERIALS
There are 2 particular materials that caused me a lot of trouble. One is the greenish metal housing on the walls the other is the stone wall in the other side of the interior. Biggest problem for them both were the fact that they appear on such huge surfaces the bitmaps had to be really large to avoid making them look too repetative. The maps were put together by me in Photoshop. Their size were 10 000 x 10 000. I only showing a 100 percent zoom in detail of the maps. I also made other bitmaps for other details.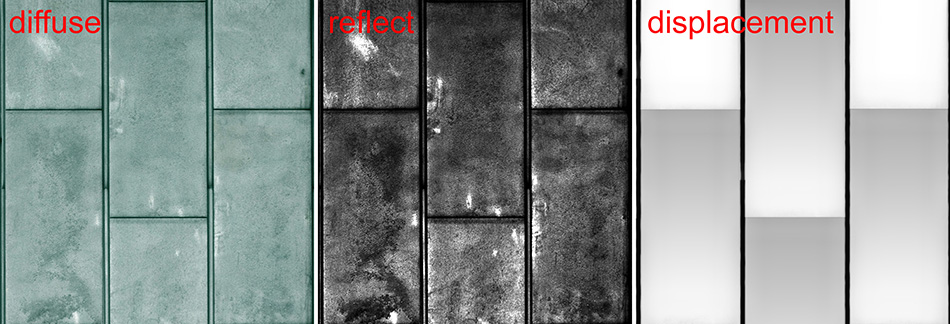


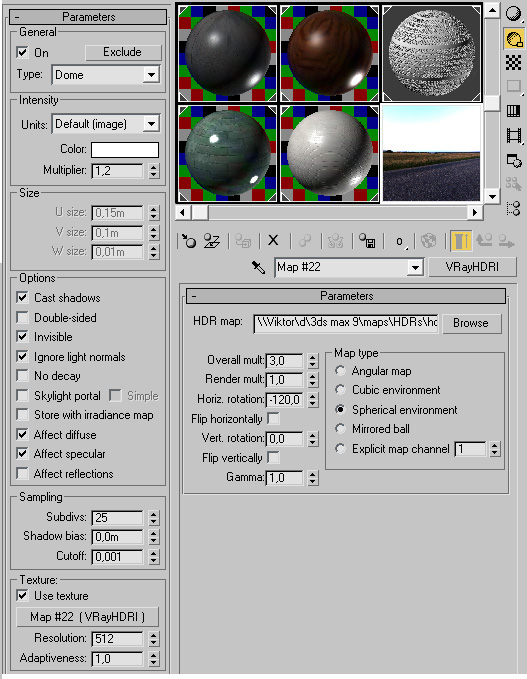
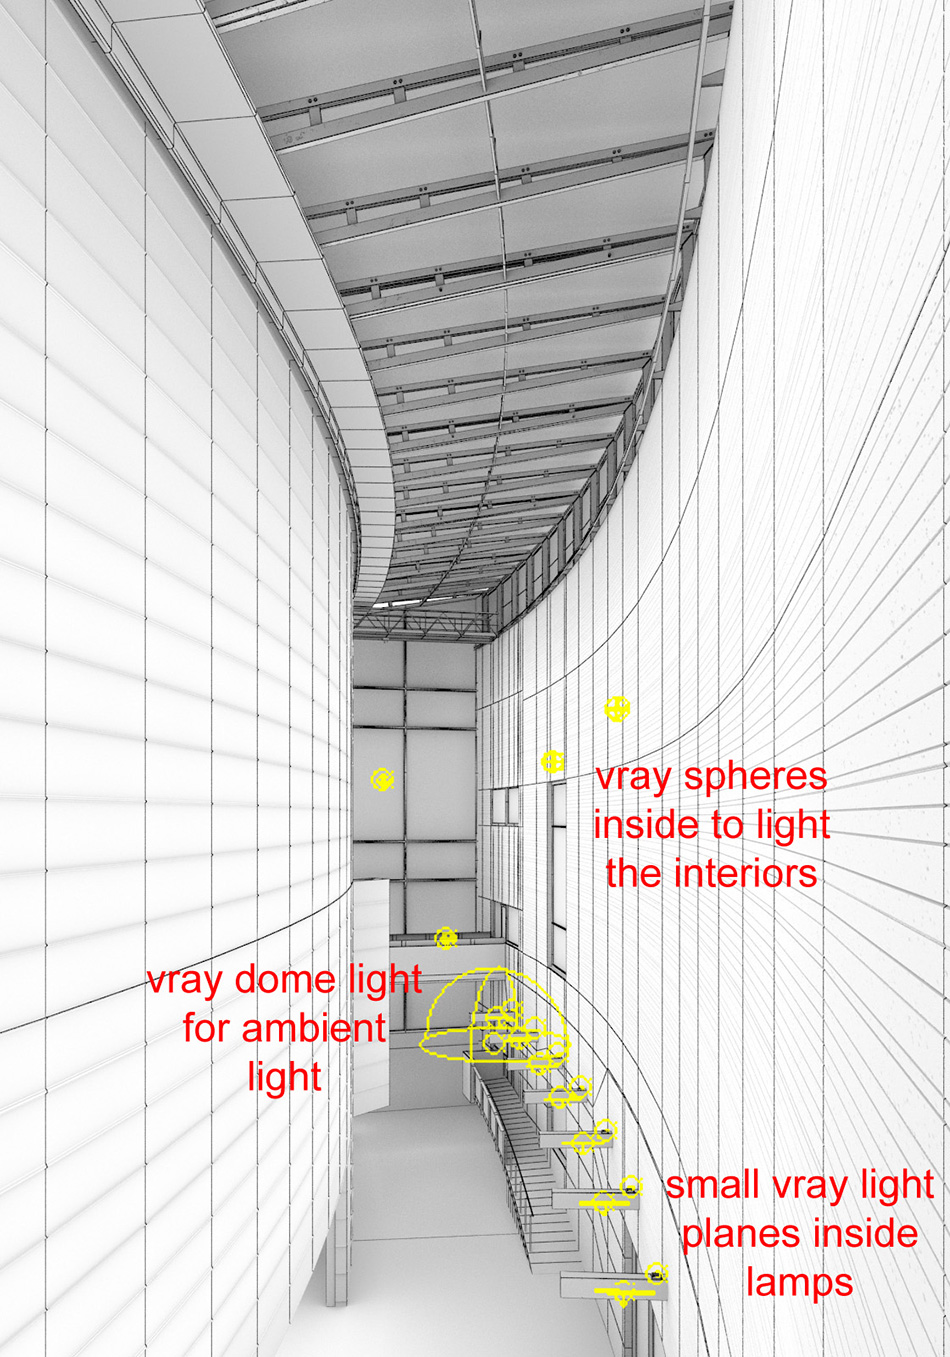
LIGHTING
I used a vray dome light for the diffuse light in the exterior scenes as well as for the interiors. I couldn't have done it using vray planes in the windows as usual because this particular round interior has different openings from a lot of directions. For the texture slot I used an HDRI and sometimes only a bitmap. If there were any sunlight in the sun that was provided by a vray sun.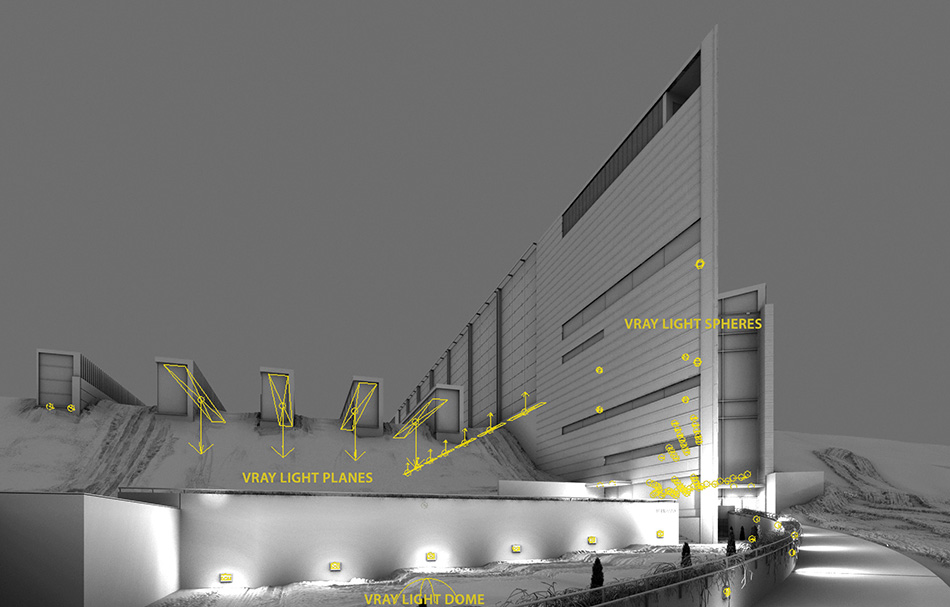
RENDERING
Nothing much to mention here. I'll just show my settings. If there's anything you don't see here it most probably means I left it on the default setting. The light sources samles are mostly on 32. Somewhere I took back from that and some times I raised it to 50. The samples of reflection/refraction is the same. The irradiance map Hsph subdivs had to be high at the night shots and could be recreased with a lot at the daylight shots. As always I used 1.0 gamma. I'm not a fan of LWF. I read about it and I know how much better it is but I just don't see that. In fact I don't see no differece in the end result at all...
POST PROCESS
I try to show you these with images rather than describing with words. I know that most of you who read this are interested in the scene with all the snow. So I have to appologize that the final PSD file was damaged I could not open it. Therefor the one I'm presenting here shows an earlier stage of the process althou the analogy is literally the same.
COMMENTS
No comments:
Post a Comment